

When your Sears LT 1000 lawn tractor’s blades refuse to engage, a faulty clutch cable might be the culprit. Instead of spending a fortune on replacements, use this guide to do it yourself and save some cash

The Issue and the Solution
While working with my vintage 2005 Sears LT 1000 lawn tractor, I noticed the mower blades wouldn’t engage. Upon inspection, the culprit was a malfunctioning mower clutch cable. The solution? Replace the mower clutch cable.
Comparing Costs: Sears vs. Amazon
Sears quoted $45 for a new clutch cable. However, a quick search on Amazon provided a more affordable option at $15. Even better, I discovered a brand new cable in my spare tractor parts bin. Although I didn’t cancel my Amazon order (it’s always good to have spares), the savings were still noteworthy.
Step-by-Step: Replacing Your Clutch Cable
Drain the gas tank
Use a siphon pump, ensuring you’re working outside due to the flammability of gasoline. Clear out any debris from the tank bottom. You can suck up the debris while siphoning the gas.
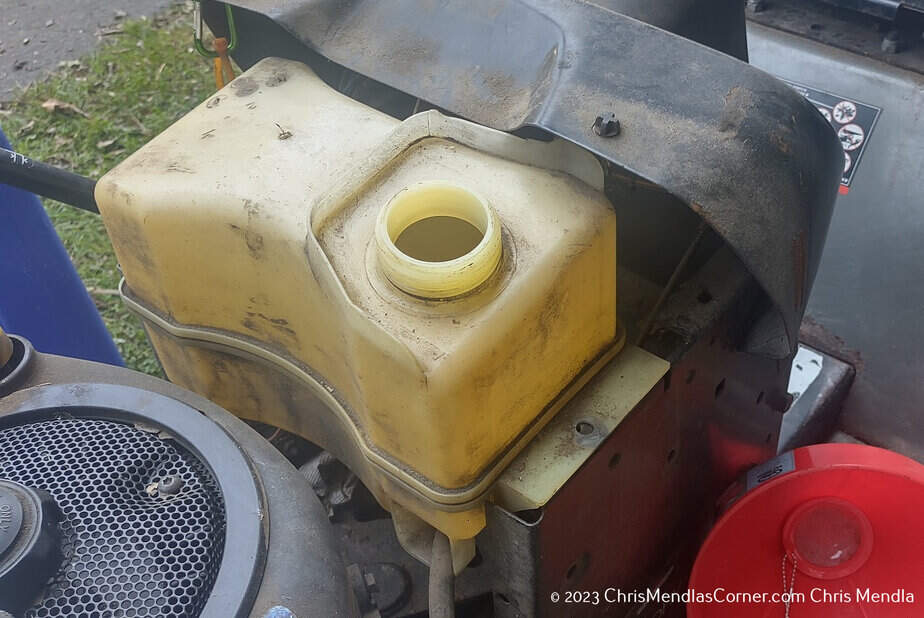
Tank Removal
The tank is held by only two bolts. Unscrew them and keep them safely stored. A magnetic parts tray is handy to make sure you don’t lose any hardware.
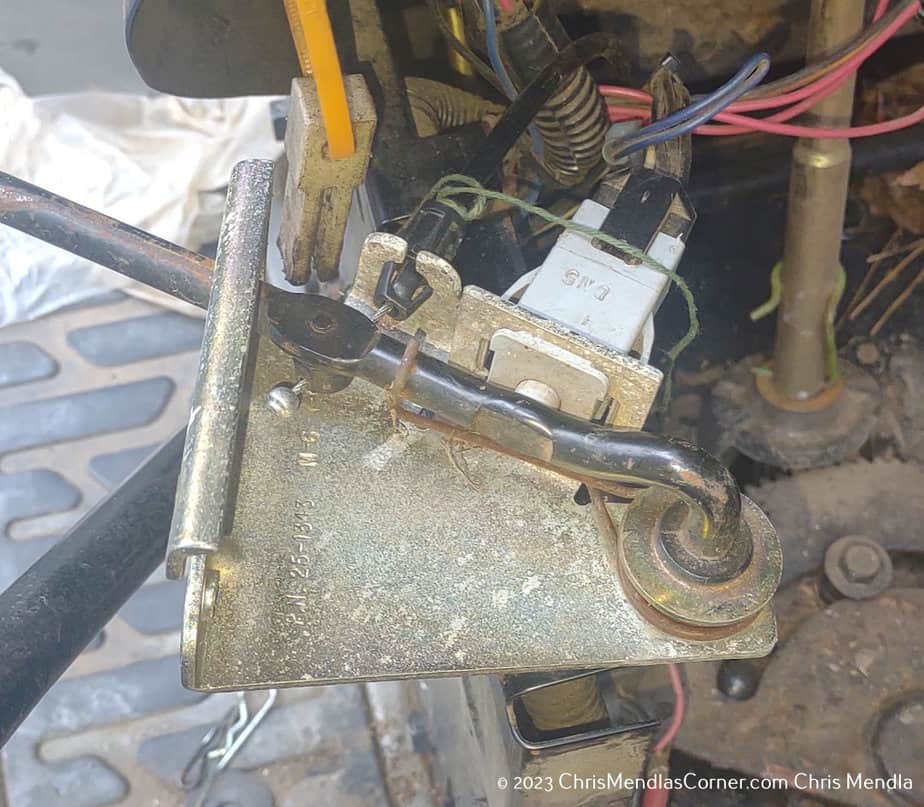
Accessing the Clutch Lever
To access the clutch lever, remove the lever knob and the four screws. This will free the clutch lever from the dash.

Prepping for Cable Removal
For easy cable removal, attach a string to the cable end with a couple of half hitches. Then, secure the other string end to the tractor. The string will let you see exactly how the clutch cable was routed and should help you get the new cable through the frame.
Cable Detachment
To detach the cable, compress its tabs using needle-nose pliers.
Guide the Cable Out
When removing the cable from the lever assembly, ensure it’s guided through the frame hole. Make a note of the cable’s path for reinstallation.
Disconnect from the Mower
For complete cable removal, detach it from both the mower’s pulley and deck fitting.
Comparing Cables
Before installing the new cable, check it against the old one to ensure they match.
New Cable Connection
Connect the new cable to the mower deck and clutch pulley.
String Transfer
Once the old cable is removed through the frame, move the string to the new cable.
Navigating Tight Spaces
Feeding the cable through the frame hole can be tricky due to the limited space. It requires patience to avoid removing the cutting deck.
Final Cable Attachment
To finalize the cable attachment, carefully use a long pair of needle-nose pliers to connect the cable end to the clutch lever assembly ball.
Reposition the Clutch Lever
Once the cable is in place, return the clutch lever to its position in the dash.
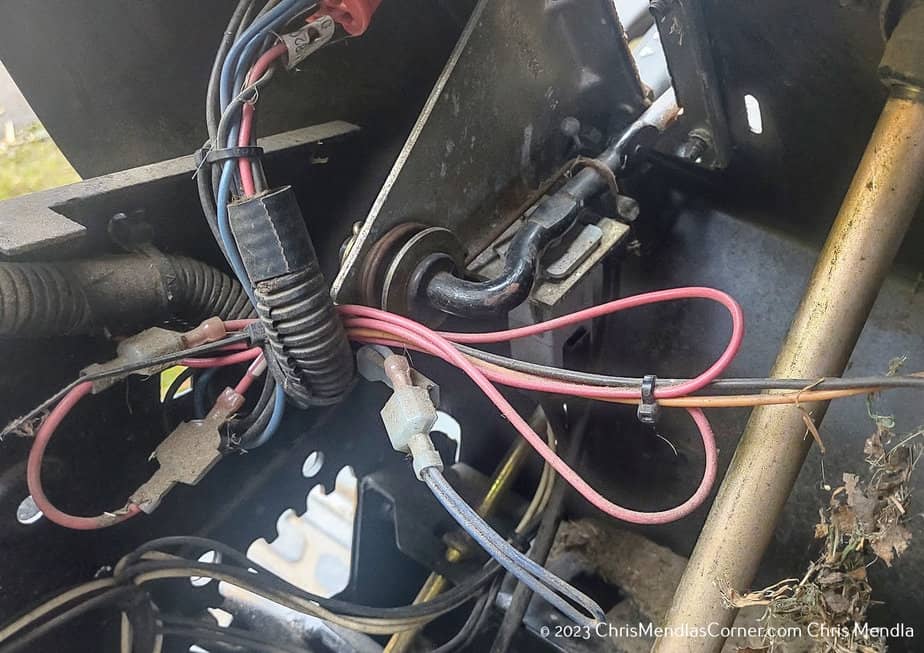
Maintenance Checks
As a maintenance measure, clear away any leaf debris. Consider applying dry lube to the steering gear for smoother operation. Accumulated leaf debris may cause rust if it gets wet. You can also clean any rusty areas and use Rustoleum Rust Reformer to stop further rusting.
Test the Clutch
Before proceeding, test the clutch to ensure its correct operation. Make sure that the mower will not start if the clutch is engaged. Conversely make sure that the engine turns over with the clutch disengaged. Remember that the gas tank is not in it’s place.
Gas Tank Replacement
After everything is checked, replace the gas tank. When refilling with gasoline, use a funnel with a screen to filter out any debris.
Once all steps are completed, test your lawn tractor. The tractor should start if the blades are disengaged. It should not start if they are engaged. Your blades should now engage flawlessly.
Results
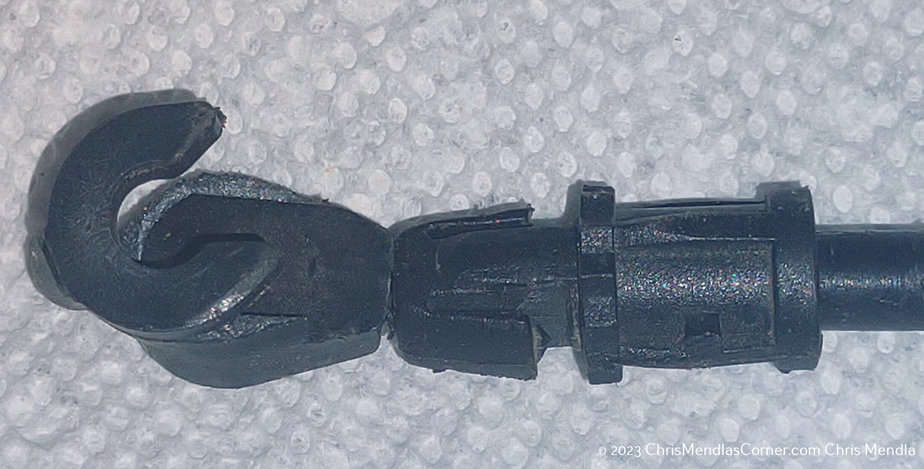
The plastic connector that connects the cable to the lever assembly failed.
Results
The mower blades are now engaging. The process took about an hour as I took my time. Getting the cable back up through the frame proved more difficult than I expected. I also took extra time to clean out the area around the steering gear and lubricate it. In addition I used Rustoleum Rust Reformer on any areas where paint was worn or the metal was rusting.
I was thinking that the plastic connection on the cable was a bit flimsy. However, on reflection, I realized I am working an 18 year old tractor extremely hard. IOW I beat the heck out of it. Also, I noticed that the front left connecting rod had lost the hitch pin connecting it to the mower deck. It is possible that put additional strain on the cab
