
Last Updated on 8 months by Christopher G Mendla
Upgrade Your Haulmaster Trailer: Add a spare tire mount for worry-free journeys. Learn the step-by-step process here!
Ownership of a Harbor Freight Haulmaster trailer or any utility trailer opens up endless transporting opportunities, from goods and equipment delivery to storing. But like any piece of machinery, trailers need regular maintenance and upgrades for optimal performance – in this post we explore adding a spare tire mount – giving you peace of mind while on the road. When replacing the wheels, we decided to mount one of the old wheels as a spare.
Step-by-Step Guide for Mounting the Spare Tire: Spare Tire Installation
Prep and Purchase:
To start off, purchase a tire mounting bracket designed specifically to secure your spare tire. While initially, your intention might have been to secure it on the A-frame of your trailer, some adjustments might be required in order to secure it properly.
Selecting Appropriate Hardware:
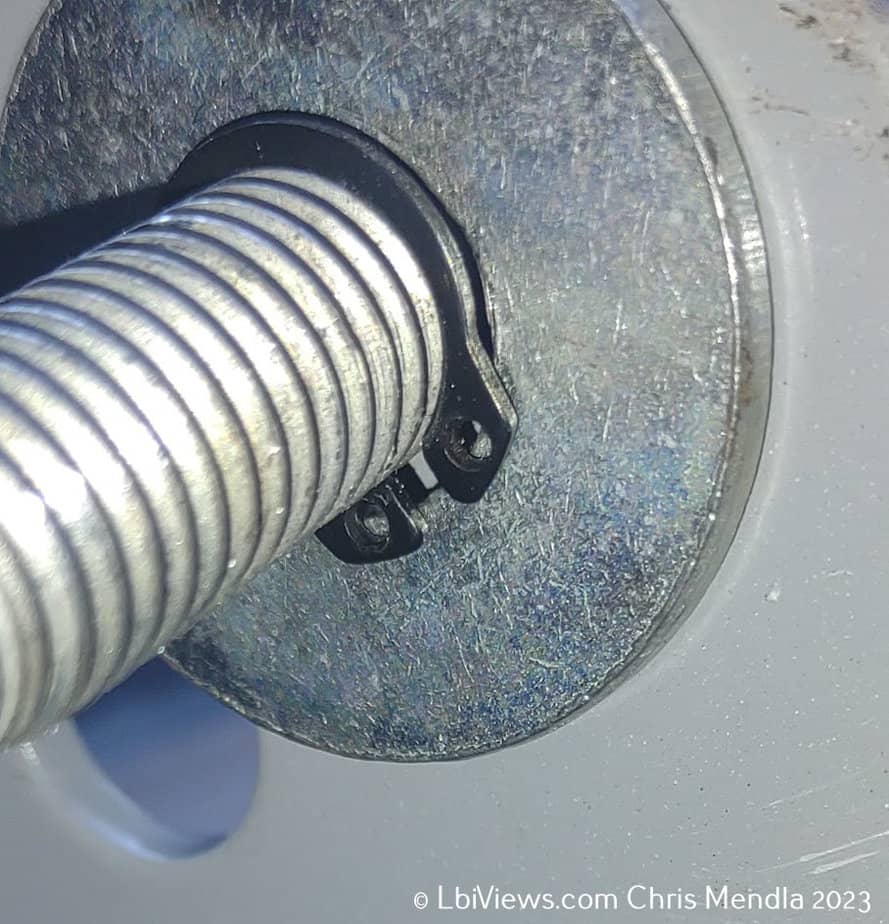
One of the key steps of this process involves choosing appropriate hardware, as mismatched bolts may lead to incompatibilities with other parts. Although metric bolts were provided with the mounting bracket, their length and lack of compatible nuts or dies became an unexpected challenge. The original metric bolts were too long. I decided to not cut the bolt because I didn’t have a nut or die to clean up the threads.
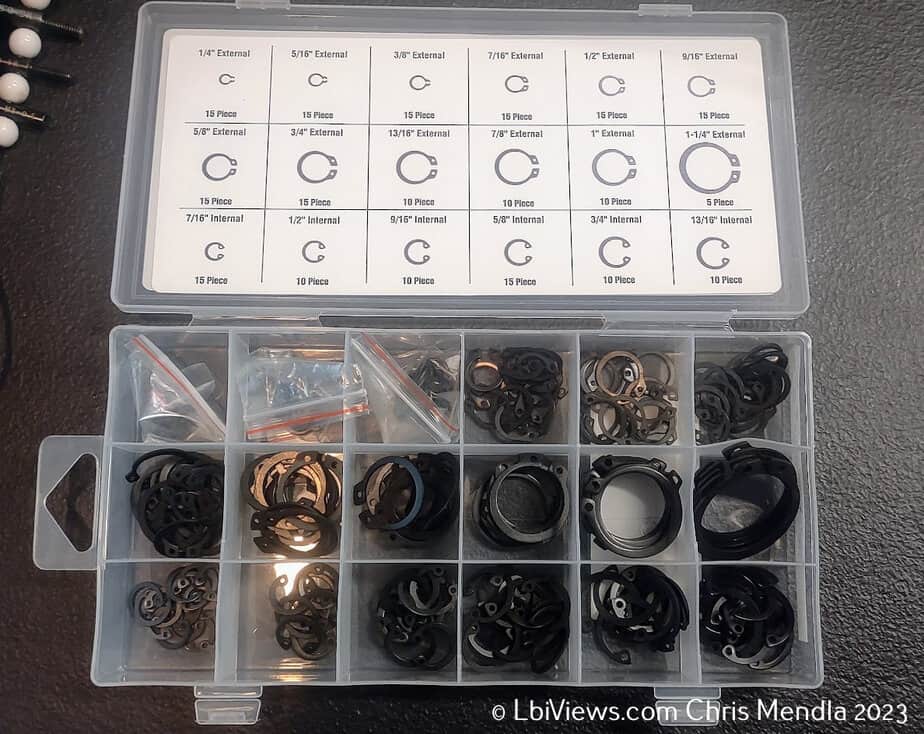
Use of a Retaining Clip:
To ensure a sturdy mount for your spare tire, utilizing a retaining clip as part of your mounting process. This can prevent frustration and streamline this step of installation. This step saves both time and frustration during mounting. Note that this is not what the clips are designed for but it works fairly well. There are specialty thin retaining nuts available
Mounting Location Adjustment:
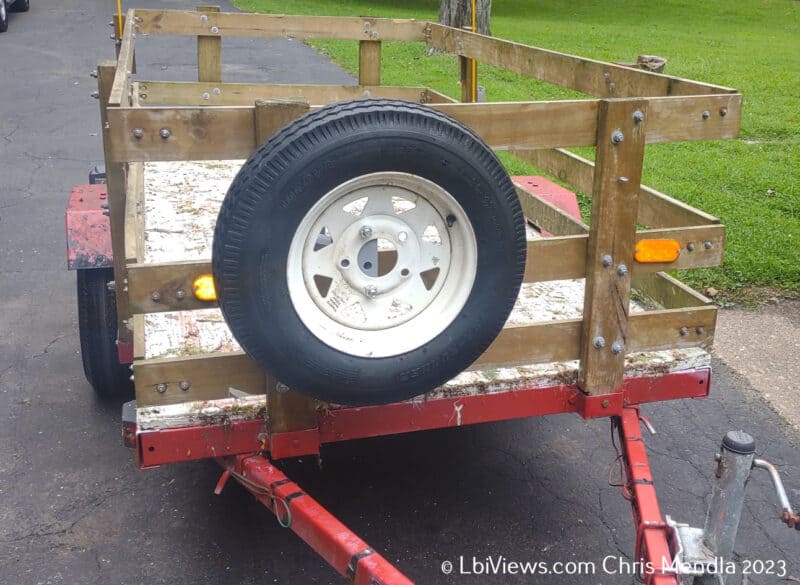
I originally mounted the wheel on the A frame of the trailer. This seemed to be a good location. It turned out to be a very bad location.
A bad location for the wheel
After experiencing vibration while pushing the trailer in the driveway after initial mounting, it became evident that structural integrity could be compromised at highway speeds.
If I was experiencing vibration at a slow walking speed, the installation was unacceptable.
The mounting location needed to be adjusted to ensure optimal stability. The A frame was simply not robust enough to handle the weight of the mounted wheel.
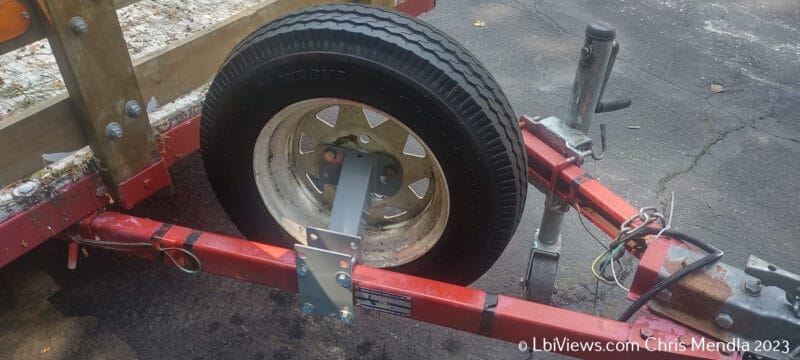
I opted to mount the wheel using one of the vertical stakes.
WARNING – Be sure that the stake is in excellent condition. I plan on running a cable through the tire connected to the trailer frame to be sure it cannot break loose in an accident and cause injury,
Stake Use:
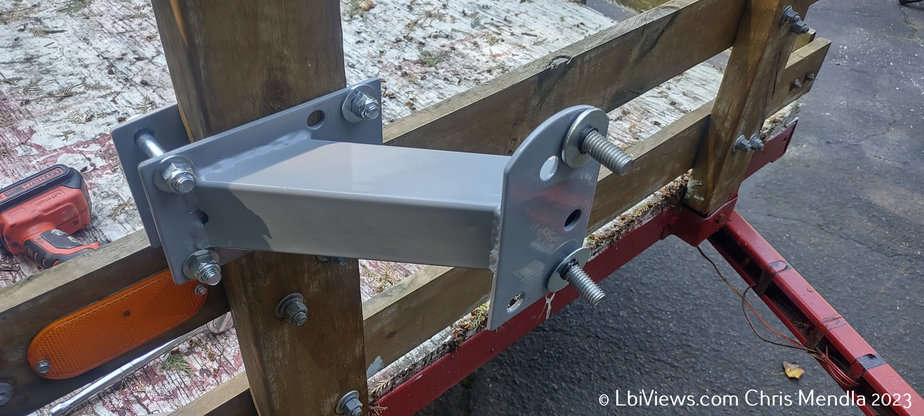
When building the trailer, opting for a 2×4 stake instead of a 2×3 can prove advantageous in increasing overall stability. The notched base provides a secure mounting point for the spare tire bracket and thus further strengthens overall support.

Conclusion: Enhance Your Confidence
Upgrading your Harbor Freight Haulmaster trailer with a spare tire mount is an investment in peace of mind on any journey. By following the steps outlined here and adapting as necessary, you will ensure a reliable and roadworthy trailer ready to tackle whatever journey awaits it.

Stop letting fear of flat tires or unexpected events stop you from enjoying your journeys. With a spare tire mount installed, you can focus on taking in every moment rather than being preoccupied by potential setbacks. Make this upgrade and you will thank yourself later on.
Don’t forget, regular maintenance and improvements keep your equipment functioning at its peak, giving you confidence to hit the road knowing that whatever comes your way will be prepared to face head on.
