

Last Updated on 8 months by Christopher G Mendla
If you repower a vintage Trac Vac 580 with a Harbor Freight 212cc Engine, you will run into clearance issues for the exhaust. In order to fit a muffler, you will need to fabricate a new exhaust pipe.
Overview – There is not enough clearance between the turbine housing and stock muffler.
The location and angle of the exhaust port is such that the muffler cannot be installed unless you reconfigure the exhaust.

Reconfiguration
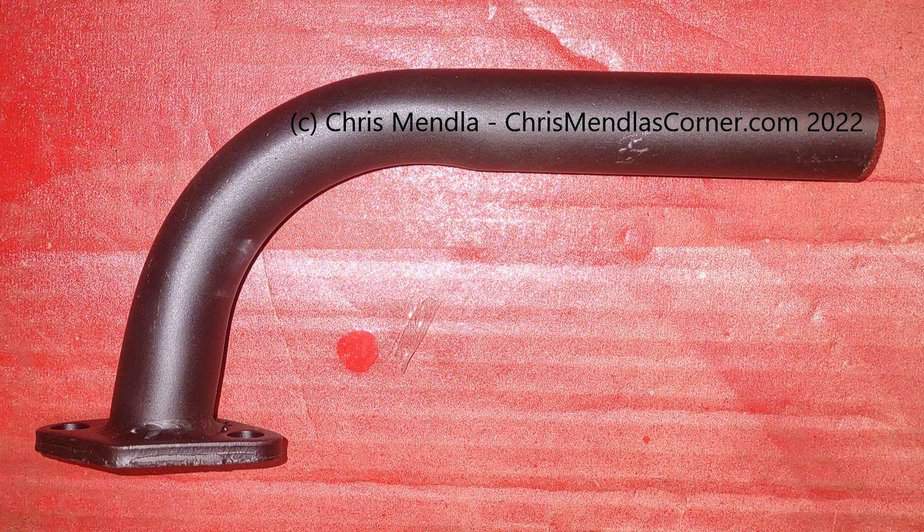
The solution was to fabricate an exhaust pipe so that the muffler can be repositioned. The clearances are VERY tight. The diameter of the exhaust pipe is about .9 inches. This is not a common size. However, there are aftermarket parts available.
The solution was:
- Purchase an exhaust pipe
- Purchase 2 exhaust flanges
- Cut the exhaust pipe to fit
- Weld flanges on both ends of the exhaust pipe
- Double check the fit
- Mount the pipe
- Mount the muffler
Purchases
In order to fabricate the pipe, you will need to purchase the pipe and flanges. I didn’t purchase the flanges and had to re-use the flanges I cut off. This is a tedious process at best. It required grinding and drilling to get the hole diameter correct. If you purchase the parts, it will save a lot of time and give a neater result.
Note that the profile of the pipe below varies. The horizontal part is a bit thicker than the vertical part. Also, the short, vertical part is too long to fit properly. You need to cut that part shorter (sorry I don’t recall exactly how much)
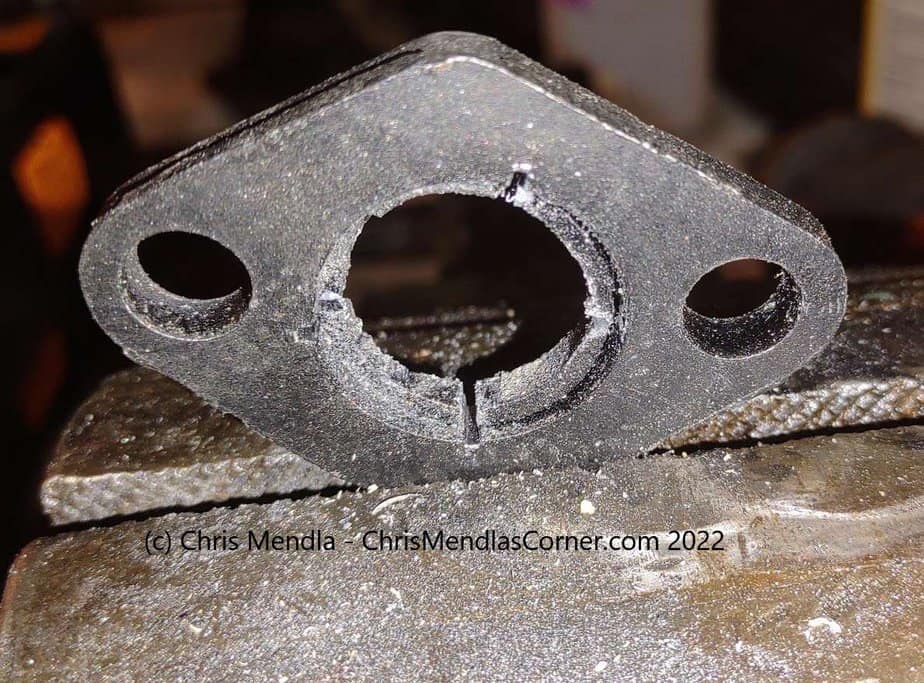
Reusing old flanges
Reusing the old flanges calls for some tedious effort. I didn’t order new flanges so I had to reuse the flanges I removed. The process was:
- Cut as close to the flange as possible with a metal cutting oscillating blade
- Check the fit with the pipe you will use the flange on
- Bore out the hole. I found a step drill worked well. I also tried a stone on a die grinder.
- When you get the hole sized, polish the flange mating surface. I held it against the side of the wheel of my bench grinder. And I still have all 10 fingers!
Check the fit of the pipe.
The clearances are very tight. You will need to determine where to cut the short end of the pipe. Measure twice, cut once. You are better cutting less than you need as you can always cut it again.
NOTE – You might want to plug the exhaust port so you don’t drop anything in the cylinder.
Next, take the pipe and flange and determine exactly how you want to mate the flange up with the pipe.
Weld the flange.
I never welded before. I purchased a low end stick welder from Harbor Freight and watched a number of youtube videos.
If you don’t want to weld it yourself, you could take it to a shop. My experience was that you really need to have the engine and turbine housing to get the configuration correct. I’m not sure what it would cost.
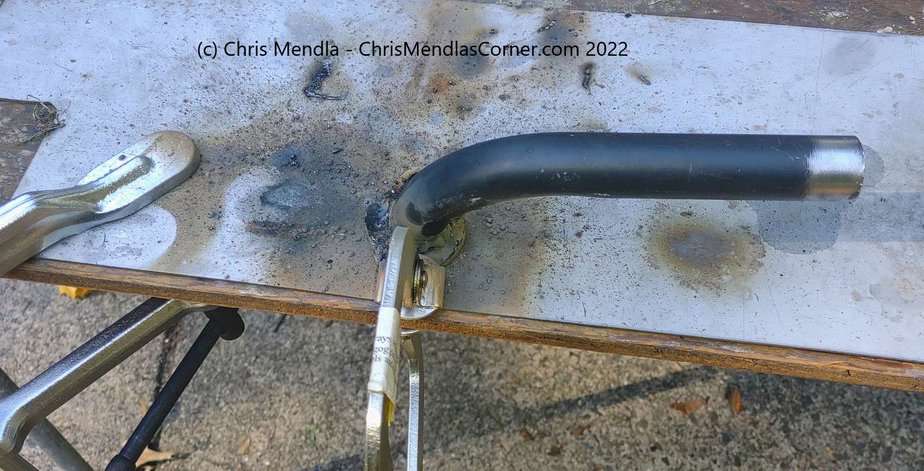
I didn’t purchase a welding table so I used a sheet of steel I had and some clamps on a plywood table. That isn’t ideal but it worked. You can see that I removed the finish from the pipe with a wire wheel.
NOTE – Welding can be dangerous. Follow ALL proper procedures and purchase good safety gear. I had to find a 20 amp outlet as the wiring in my garage needs an update. I was able to plug the welder into a kitchen 20 amp GFCI receptacle and weld outside.
HINT – Instead of welding all around the pipe, try two small welds to tack it in place. Then try the fit. NOTE – the pipe will be VERY hot after welding. As I understand it, you want the pipe to cool naturally. Don’t quench it with water as that can weaken the weld.
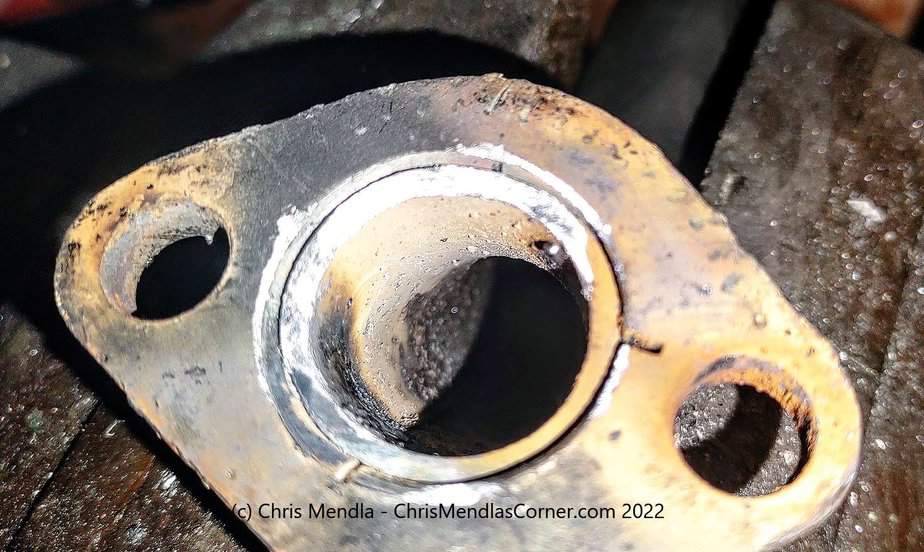
Be sure that the pipe does not extend beyond the mating surface of the flange. If it does, you will probably have to grind it down.
Once you get the configuration correct, complete the weld.
Verify the location and angle of the second flange.
Fit the pipe on the exhaust port studs and determine the position of the second flange with the muffler. Weld that flange in place and double check the positioning.
Install the pipe.
The rear bolt was very difficult to reach. I bent a wrench and ground down the profile a bit. When I get a chance, I will probably remove one of the cooling fins to allow better access. That should not cause any overheating issues.
Another option would be to not install the impeller until the exhaust is fitted. That way, you can mount the turbine housing, fabricate the exhaust and then remove the housing to fit the pipe.
Install the muffler
The flange on the muffler will mate to the flange added to the pipe. Secure that with bolts and a gasket.
WARNING – The muffler is hot
This reconfiguration will place the muffler in a position where it is more likely for someone to come in contact with it. I painted it with some range high visibility high temperature paint.
Results
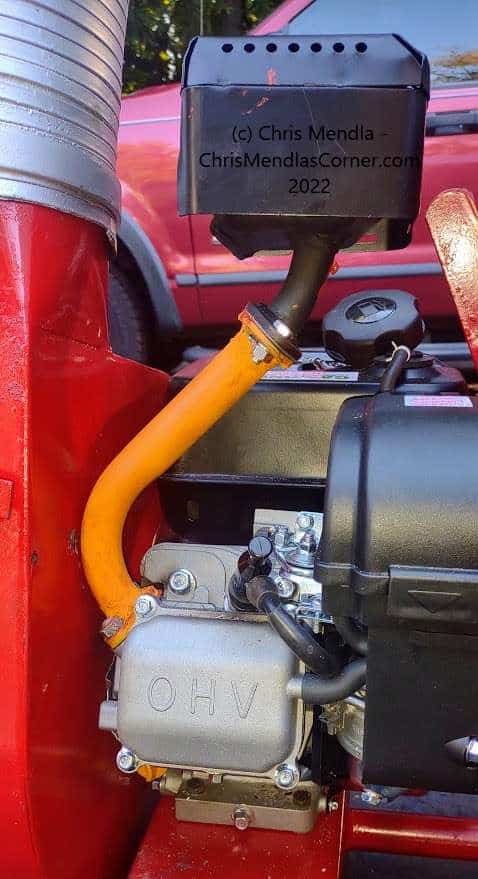
The resulting configuration allows the installation of a muffler despite the minimal clearance between the exhaust port and engine. It also allows easy access to the spark plug and does not interfere with the carburetor and throttle linkage. As noted above, you will need to be careful to not touch the hot muffler.
The muffler shown is the standard muffler for the predator engine. The angle of the pipe coming of the engine worked nicely with the angle of the mounted exhaust pipe. I probably could have shortened the long end of the pipe by an inch or inch and a half. On the other hand, that would bring the hot muffler closer to the gas tank
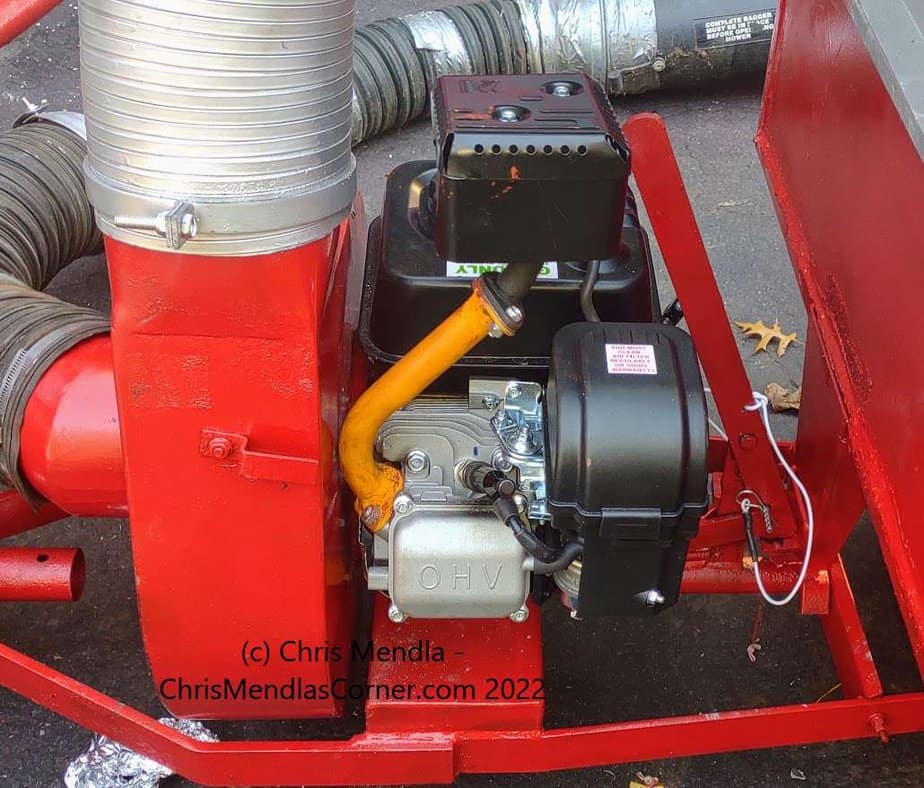
Below is another view of the installed muffler. There is more clearance between the muffler and dump handle than what appears in this photo. The minimal clearance between the exhaust and turbine housing is evident.
Restoring and repowering a Trac Vac 580 – Other articles
- Restoring and repowering a Trac Vac 580 main page
- Removing the impeller
- Reconfiguring the exhaust system
