Last Updated on 2 years by Christopher G Mendla
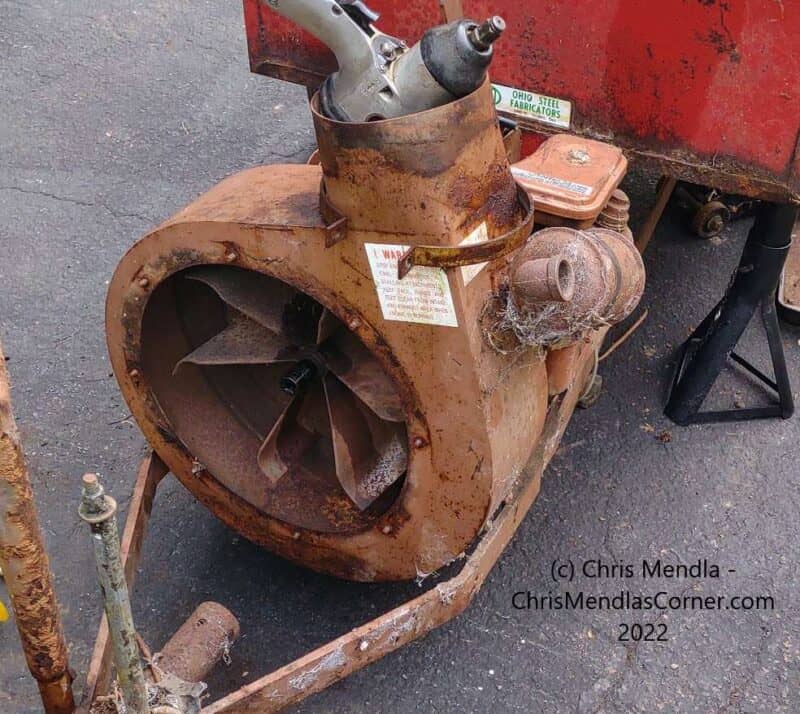
Restoring and re engining my Trac Vac 580 required removing the old turbine. This turned out to be a time extensive and frustrating task.
Overview
I restored my Trac Vac 580 and replaced the engine in the process. My evaluation was that the original Briggs and Stratton engine had seen hard use and was in bad shape from sitting in the weather for over a decade. When it was last run, it had a blown head gasket.
In order to replace the engine, the turbine must be removed from the engine shaft. That will allow access to the bolts holding the turbine housing to the engine. The turbine is attached to the shaft with a set screw holding a Woodruff key and a bolt into the end of the engine shaft. In other words, a standard arrangement. The turbine is fitted with six indentations for a puller. However, these are fairly shallow and could not get a good grip on the hub. There was some evidence that the turbine might have been replaced or serviced in the past.
To access the turbine, you need to remove the nuts holding the plate on to the turbine housing. Surprisingly, these were easy to remove. Once the plate is removed, you have access to the turbine.
Removing the set screw
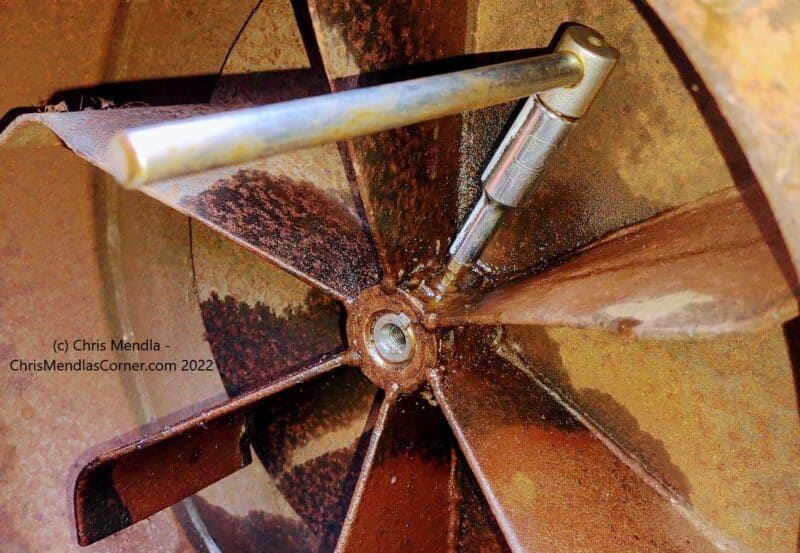
There is a set screw on the hub that locks down the Woodruff key. That was stubborn. I had the correct size allen wrench but could not get enough leverage. The vanes of the impeller limit your clearance.
I used an allen wrench bit fitted into a 3/8 inch drive deep socket. I fitted a breaker bar to the socket. I had liberally doused the set screw with penetrating oil over a day or two. You need to make sure that you don’t strip the set screw head while attempting to remove it. HINT – A short pieced of 4 x 4 inserted into the discharge chute will keep the turbine from rotating.
Fortunately that came out relatively easy. You can see the Woodruff key at the one o’clock position. You can also see one of the indentations for a puller at the three o’clock position on the hub.
Removing the impeller from the shaft
The procedure SHOULD be simple. (1) Remove the bolt at the end of the shaft (2) Remove the set screw (3) Use a puller gripping the indentations in the hub. If it is stubborn, then soak it with penetrating oil and perhaps go through a couple of heating/cooling cycles.
SHOULD is the operative word. This impeller was so stubborn I was seriously beginning to wonder if it was welded to the shaft. I’ve used pullers in the past and they usually worked well. I started off with a couple that I had around the garage. The jaws kept slipping off.
There is no way to hammer the impeller from the rear unless you were to drill through the turbine housing. The turbine housings are a couple of hundred dollars so I didn’t want to do that.
I tried gently tapping the exposed end of the Woodruff key and tapping the impeller to set up vibration for the penetrating oil. The next step was to try a MAPP torch and cooling penetrating oil.
I purchased a set of pullers from Amazon. The profile on the jaws was too thick to get a good grip on the puller indentations. I tried using a bench grinder to reprofile them. However, the jaws kept popping off.
I could get about 1/8 inch of movement. When it would move no more, I would tap it back onto the shaft.
NOTE – I should have pulled the engine and turbine assembly and taken it to a small engine shop. However, I’m not sure if they would have had any better luck.
My goal at this point was to save the impeller for reuse and possibly save the engine.
I purchased a large and small puller set from Harbor freight. These were semi pro tools. The impeller remained stuck. At this point I had perhaps six hours or more invested. Tap, soak, try to pull, heat, cool, repeat.
The next try involved using a good set of drill bits to try and drill out the Woodruff key. That was probably not a good idea. I was able to get a pry bar between the turbine housing and impeller. There wasn’t a way to apply a lot of force without risking the (expensive) housing.
I decided to hit it from the rear. My thought was that if I could get the engine disassembled enough, I might be able to free the shaft. The design of the engine didn’t allow disassembly unless the engine was removed from the turbine housing. However, the turbine housing prevented access to the bolts holding the engine to the housing. Even if I could remove the bolts using the holes in the turbine, the impeller was still frozen to the shaft.
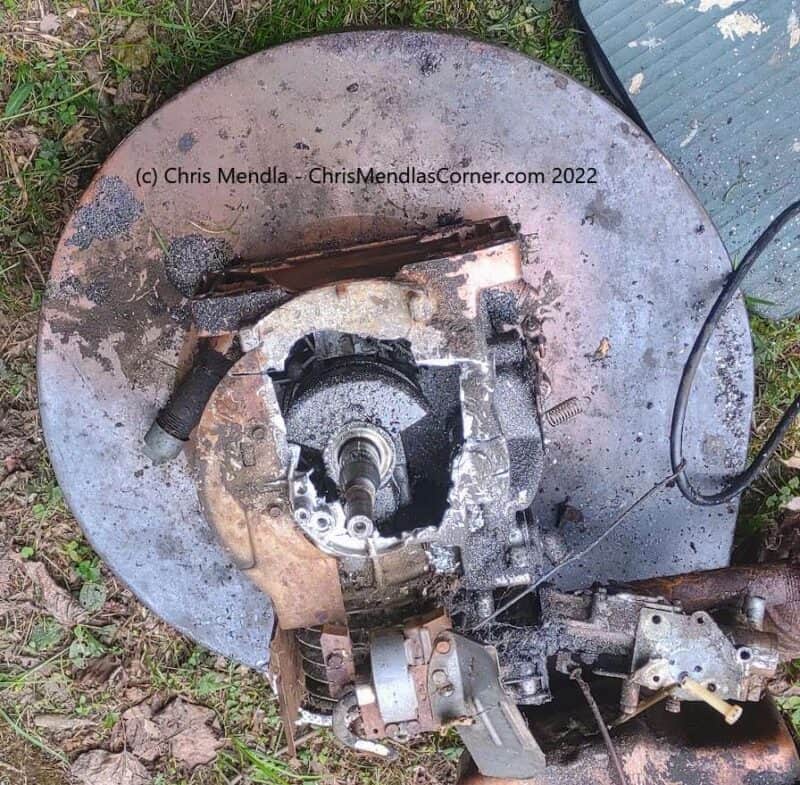
A combination of a grinder, drills, oscillating tool, various hammers and punches resulted in a thoroughly mangled engine. For what it is worth, the piston and crankshaft looked to be in decent shape.
From what I could see, the shaft would be very difficult to cut mechanically. A plasma cutter MIGHT work but it might also damage the impeller and housing. I scooped up the aluminum and steel shrapnel and went back to attacking the problem from the impeller side.
I tried drilling out the shaft. That helped a little. I could now move the impeller a full 1/4 inch. Then I thought of drilling a series of holes across the impeller plate and using an oscillating tool to connect the holes. My thought was that would allow me to separate the two halfs. That was a totally brilliant idea except for the small fact that it didn’t work. The hub of the impeller is substantial.
I went into a obsessive compulsive mode. Well, not quite. I started tackling other tasks. I figured that if I could not remove the turbine, I could purchase a new housing and impeller. At this point, I ordered an impeller from Trac Vac. This machine came off the production line almost fifty years ago. I almost fell out of my chair when I saw that they still provided replacement impellers. I ordered it and it arrived a couple of days later.
At this point, the impeller was thoroughly mangled. There was zero chance of getting any kind of a puller on the hub as the hub was metal filings. I went back to heat, cooling, penetrating oil and tapping. It sounded like a church bell gone crazy.
Fortunately, the impeller would still rotate despite the engine looking like it took a 20mm cannon shell hit. I kept prying, rotating an eighth of a turn, and prying again.
Success
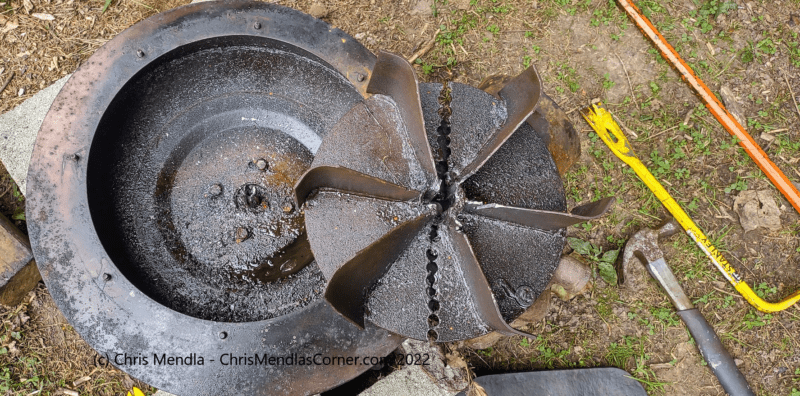
I think every neighbor in a quarter mile heard me yelling for joy. The impeller finally moved an inch. A few minutes later I had it off what remained of the shaft. Note the holes drilled across the plate of the impeller. I’m not sure if that helped or not. It required a good bit of effort. Also note which holes were used to attach the turbine to the engine. I would suggest taking a picture.
At that point I could access the four bolts holding it to the engine. The housing was not damaged. The impeller and engine were scrap.
Lessons learned
- Be patient, especially with the set screw.
- Soak the shaft liberally with penetrating oil. Try heat and cooling along with tapping the hub.
- The indentations for the puller are shallow. Consider purchasing a good puller if you don’t have one.
- Consider removing the engine and turbine and taking it to a small engine shop if you run into trouble.
- I had considered welding something to the turbine to give the puller a better grip but I am a complete newbie to welding.
- You should be able to get a small crowbar or prybar between the impeller and turbine housing. I would suggest trying to wiggle it rather than applying brute force.
Restoring and repowering a Trac Vac 580
- Restoring and repowering a Trac Vac 580 main page
- Removing the impeller
- Reconfiguring the exhaust system


