
I had a length of 1/2″ pipe that ran parallel to a cinder block wall. It was about 6″ from the wall and therefore unsupported. I made a pair of stanchions to properly support the pipe.
The problem
Whoever installed the dryer for a previous owner dropped the pipe down about six inches from the wall. This left the pipe unsupported. One choice would be to redo the pipe so that the horizontal part in the rafters met the wall. Another choice was to use stanchions.
NOTE – Check with your local building codes to see if this is an acceptable way of supporting the pipe.
Design
The design was simple.
- Secure a flange plate to the wall
- Use 1/2″ iron pipe of an appropriate length
- Drill and tap a cap for the end of the pipe
- Attach a pipe hanger by threading through the cap and securing with a lock bolt.
Parts
Each of the two stanchions required the following parts.
- A 1/2″ flange
- 1 length of 1/2″ iron pipe (Galvanized or black iron)
- 1 1/2″ cap
- 1 Bolt with a nut and lock nut
- 1 pipe hanger
- Rubber gasket material
- 4 Tapcon screws
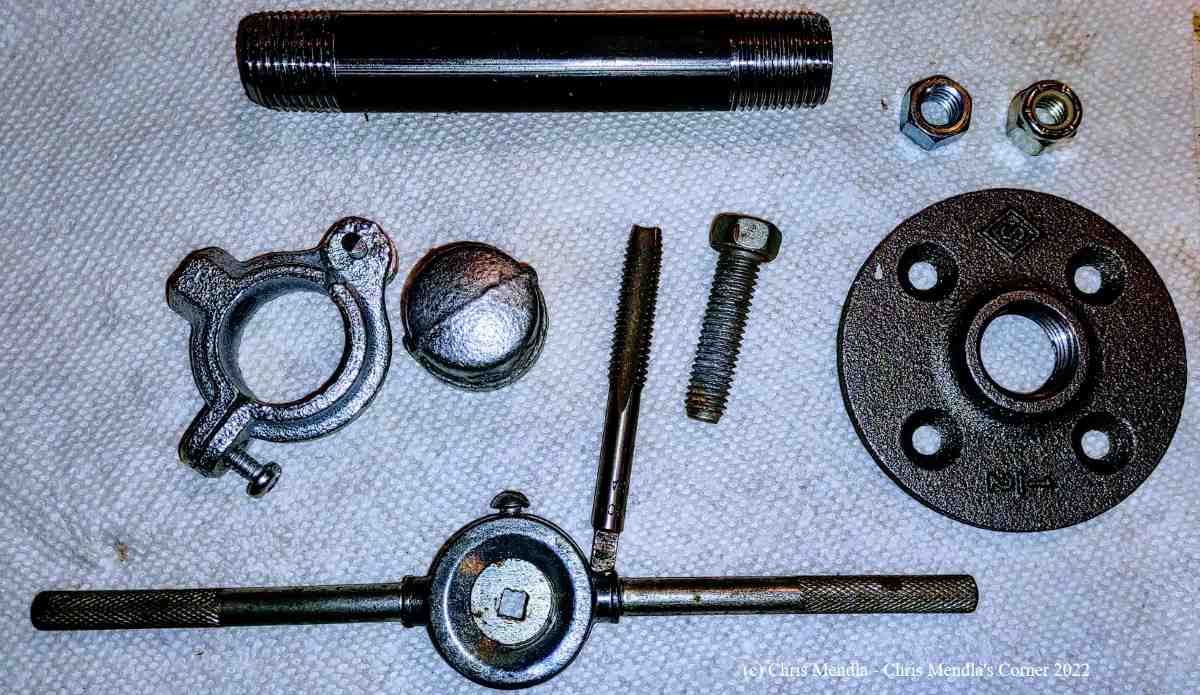
Tools
- Hammer drill or regular drill
- Tap set
- Pipe wrenches
Drilling and threading the cap
One could use an unthreaded hole but a threaded hole will be more secure. BE SURE to center the hole as precisely as possible. I was slightly off on one cap and that necessitated changing the bolt to a slotted screw.
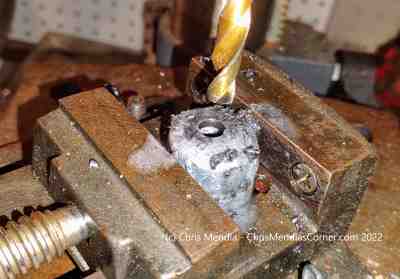
After drilling the cap, thread it to accept the bolt you will be using

Insert the bolt from the bottom of the cap

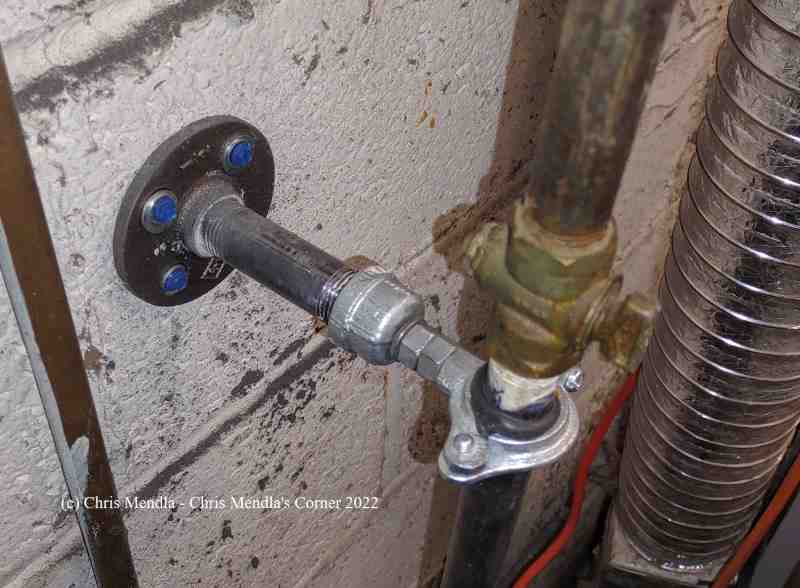
Assemble the pieces
I used pipe dope and did the assembly with a vise. I cut a small piece of rubber gasket to cushion the pipe in the hangar. The pipe came down at an angle which resulted in the need for two different lengths.

Attach to the wall
Double check the measurements and attach the Stanchion to the wall using Tapcon screws or anchors. Then attach the hanger to the pipe.
Summary
I used 2 stanchions for about 7′ of pipe. It is now fastened securely to the wall.
Note
One of the holes I drilled in one cap was slightly off center. This precluded inserting the bolt. I rounded off the corners of the bolt and created a slot for a flat head screwdriver with a handheld cutting wheel. That allowed me to thread the bolt into the bottom of the cap.

