Last Updated on 2 years by Christopher G Mendla
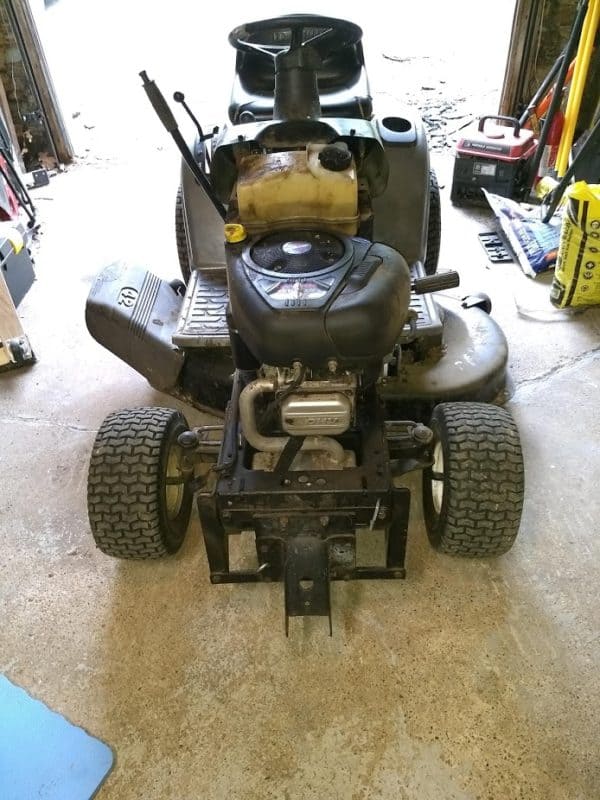
My Craftsman tractor was blowing smoke from a blown head gasket. I opted to replace it myself.
UPDATE – October 2020 – So far so good. I replaced the head gasket in May 2019. The engine is running strong. I ran the tractor hard over the past year. That includes snow plowing, wood hauling, mulching leaves and cutting grass. The investment in time and money seems to be well worthwhile.
Update August 2023 – The tractor is still going strong. It has been four years of pushing the little tractor to it’s limits. Oil consumption is minimal. Power is great and no smoke.
Diagnosing a blown head gasket
The first step is to determine IF you have a blown head gasket. The symptoms in my case were
* Smoke from the exhaust especially when under load or reducing the throttle.
* Smoke coming from the oil fill after shutting down the engine
* High oil consumption.
I tried Barr’s Stop Leak but that only made a very slight improvement. Everything pointed to a blown head gasket. I had a couple of choices:
- Try a repair.
- Replace with a used tractor
- Buy a $$New$$ tractor
I decided to try replacing the head gasket. I’ve done repairs on small and large engines before and have a decent set of tools.
Note that if you try a repair, be prepared for a worst case scenario where you brick your engine. Have a backup plan.
The job took about 3 hours but I took my time. A lot of that time was spent cleaning the carbon and crud from the cylinder and head.
The first step is to prepare for the job.
Identify your engine
You are going to need the model number of the engine in order to determine some key adjustments. In the case of my tractor, Sears Parts Direct showed the engine model based on the model number of my tractor. That matched the model number stamped on the top of the valve cover.
Look for videos and sites.
Look for a couple of videos on the process (I have some listed at the end of this post). Each video will have some slightly different approaches and tips.
Purchase the parts
Determine what you need. I only purchased the head gasket from Amazon. I saw a lot of complaints but the gasket that was delivered was an original Briggs and Stratton gasket.
Prep your work area
My garage and workbench’s normal condition is that of semi controlled chaos. Some prep time made the process go more smoothly.
- Sweep the floor. This is helpful if you drop any parts.
- Clean the tractor. If you have a lot of grass and leaves on the tractor, clean them
- Try to have 6-8 square feet of work bench space.
- Make sure you have adequate lighting including a flashlight.
Parts and tools checklist
Here are some things that will make the job easier.
- The replacement head gasket. The cost was about $12
- New head bolts. Several sources say you should discard the old bolts and replace them. Oops. Didn’t see that coming so I reused the old ones.
- 1 or 2 rolls of paper towels.
- A box of nitrile work gloves.
- At least 2 magnetic parts trays.
- Lacquer thinner.
- Brake parts cleaner and/or starting fluid
- Sockets and wrenches including metric wrenches (I’ll explain that )
- A set of Torx bits from about T-15 to T40
- A small brass brush
- A plastic scraper about 1″ wide
- A new spark plug. If you had a bad head gasket, the plug will be full of crud. You should have a spark plug gauge
- Flat feeler gauges.
- A torque wrench. I had the old style torque wrenches with a ‘needle’ indicator. That is as accurate as a wild assed guess . You can get a decent click type torque wrench from a place such as Harbor Freight for about $20.
- A battery powered screwdriver/drill
- Either a gasket and/or Form a Gasket for the valve cover.
- A cushion or kneeling pad.
- Specs
- Valve clearance specs for your engine
- Head bolt tightening sequence and torque specs.
- Spark plug type and gap settings.
Finding the specs can take some time. You can’t guess at the valve clearances or head bolt torque. Plan on spending some time getting that right.
Disassemble
The process will be pretty much the same for any tractor. Remove the hood and start taking stuff off. Note that one video showed the Carb being removed from the tractor. Another showed a much simpler way of putting it to the side. You can stuff paper towels into any openings but be sure to remove them.
The magnetic trays are nice in that you can put the bolts on the tray in the order you removed them. That helps a bit when re-assembling.
Check the valve clearances
I have only set valve clearances on any engine less than a half dozen times. Before you take things apart, try checking the existing clearance. The process takes a bit of practice. There are videos showing how to do this. Essentially, you rotate the flywheel so one valve is open and then check the other valve.
NOTE When you pull the pushrods, note that there are two very small caps on the valve stems. DO NOT LOSE THESE. They should be steel and should stick to your magnetic parts pan
I mentioned having metric tools available. For some reason, the nuts on holding the rocker arms were Metric, not English. Fortunately I had a wrench available. In this case, an adjustable wrench would have worked.
Clean
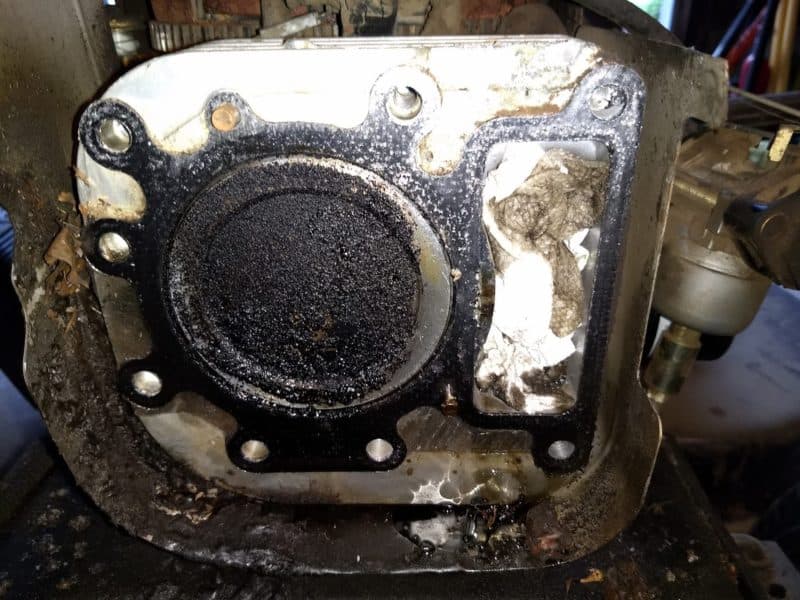
Your cylinder head and piston will probably be cruddy. BE VERY CAREFUL WITH CLEANING. Note the rag stuffed in the opening on the right. Also, note that the piston is at Top Dead Center to prevent dirt getting into the cylinder. When you are done, rotate the flywheel so that the piston moves down about a half inch and clean the cylinder.
When cleaning the cylinder head, I found that putting a towel soaked in lacquer thinner on the valves helped loosen the crud.
If you look closely, you can see where the head gasket failed. The passage to the right is stuffed with a paper towel to keep debris out. At the 3 O’clock position of the piston, you can clearly see the marks from the exhaust.
Below is the result of some time consuming cleaning.
Here is the piston and block after cleaning. Again, make sure you are not scratching the surfaces. Also, do not use things such as oven cleaner which could hurt the aluminum.
The exterior of the cylinder head was completely full of crud. There is a passage under the H in OHV. That was completely clogged up. It is there to provide cooling. The spaces between the cooling fins were also filled up. This is not good for an air cooled engine.
I scraped the worst of it off. I found that starting fluid worked as well as the more expensive parts cleaner. I didn’t get every bit off as I’m looking for function, not form. The goal was to restore air cooling and make it easier to spot any future leaks.
Below is a magnetic parts tray. These things are REALLY handy.
Inspect
While you have everything disassembled check things out. Some things to look for are:
- Scratches on the cylinder walls.
- Any cracks in the block or head
- Worn or bent pushrods.
Reassemble
Take your time putting everything back. One tip I picked up was to use a flashlight to line up the pushrods.
The proof of the pudding
I fired up the tractor before I replaced the hood. It was easier to see if there were any leaks. There was some smoke from oil that had spilled on the muffler. I replaced the hood and cut about an acre and a half. No more toxic smokescreen. When I shut down I opened the oil fill cap. There was no more smoke coming out of the crankcase.
Safety Safety Safety
You will probably end up with a trashbag full of oil and solvent soaked paper towels. This presents a danger of spontaneous combustion. Take the trash out when you are finished or at the end of each day.
Summary
This project went surprisingly well. I only ran into a few minor things like having to run out to pick up a spark plug. Prepping beforehand really made it go smoothly. I spent perhaps 3 hours. That is still better than paying $200 to $300 at a shop.
Videos
These are some suggested videos. There are a lot more available.
Here are some sample videos.
Update – As of August 2020, the engine is running strong with minimal oil usage.


What gasket did you use?? Mo #917.272761 is mine.
To be honest that was a while back
I believe I got it from Amazon at https://amzn.to/3k1AdL2